Search This Blog

Showing posts with label heart healthy. Show all posts

Thursday, June 4, 2020

Colorful Chickpea California Rolls (Vegan, Oil-Free)

These Colorful Chickpea California Rolls make an easy, delicious, and nutritious dinner.  They are veggie-packed, tasty, and satisfying!  Just like my Crispy Tofu Spring Rolls, this recipe is wonderful for using up leftover veggies in your fridge!  Ingredients are limitless.  You can put in almost any variety of veggies or easily make these non-vegan (highly recommend cucumber, smoked salmon, and cream cheese). 


Ingredients:

For the rice:
1 cup sushi rice (Japanese short-grain rice)
1 and 1/4 cup water (you may need more)
3 tablespoons rice vinegar
1 tablespoon soy sauce

Remaining Ingredients (Sub/Add as you please)
4-6 Nori Sheets (you can find these at your local Asian market)
1 bell pepper, thinly sliced (your choice of color)
1 carrot, thinly sliced
1/2 cucumber, thinly sliced
2 green onions, thinly sliced
1 cup boiled or canned chickpeas
2 tablespoons sriracha
2 tablespoons mustard

For serving *optional*
Soy sauce
Pickled ginger
Pickled radish
Wasabi
Sesame Seeds

Instructions:

Following these instructions exactly will provide the best results.

1. Prepare the rice:  Start by rinsing and draining the rice three times.  Place the rice in a saucepan and add the water so that the water is about a 1/2 inch higher than the rice line.  Cook over medium heat until the rice is cooked and the water has evaporated.  Remove from heat.

2. While the rice is still warm, add in the rice vinegar and soy sauce.  Mix the rice with a fork until the rice is well mixed.  It should be sticky.  Set aside.
3.  Prepare the chickpea filling:  In a bowl, mash the chickpeas with a fork.  Add in the sriracha and mustard and mix well.  Set aside.
4. To assemble California rolls, place a nori sheet on a dry surface or plate.  The rough side should be facing up and the smooth side should be facing down.
5.  With a spoon, gently spread the sushi rice over the nori, leaving 1 inch at the top of the nori bare.  Make sure the layer of sushi rice is thin.
6. In the bottom third of the nori closest to you, gently spread a tablespoon or two of the chickpea mixture in a straight line.  Then, lay a thin slice of bell pepper, carrot, cucumber, and green onion in a straight line over the chickpea mixture.
7.  With dry hands, begin rolling the nori and rice over the vegetables and chickpea mixture.  Before continuing rolling, make sure the veggies are compressed fairly tightly within the first roll.  Then, continue rolling upwards.  Place the final California roll seam-side down.  Repeat.
8. Once you are ready to serve, gently slice the California rolls into 1 inch pieces with a serrated knife (slow saw motions work best).
9.  Serve the California rolls with the optional soy sauce, pickled ginger, pickled radish, wasabi, and sesame seeds.
10.  Enjoy!  Although, these are best eaten fresh, you may store leftover California rolls in an airtight container in the fridge for 1-2 days.


#halahbakes


Thursday, May 7, 2020

Crispy Tofu Spring Rolls (Vegan)

Want a healthy and delicious appetizer for your meal tonight?   This recipe is incredibly easy to make and is extremely versatile (aka use up leftover veggies in your fridge!).  Make them non-vegan (highly recommend adding panko shrimp!).  Or, make them no oil friendly (by skipping the fried tofu step and simply adding thin strips of firm tofu instead.).

Ingredients:

10-12 rice wrappers
4 oz rice vermicelli (thin noodles)
1 pack extra firm tofu, drained and dried with a towel
3 tablespoons sesame oil (or, sub canola oil)
1/2 bunch cilantro, chopped
1/2 bunch mint, chopped
4-5 green onions, sliced into very thin strips
15-20 Thai basil leaves (look for this at your local Asian grocery store, or sub American basil)
15-20 spinach leaves (or, sub another leafy vegetable)
2-3 chopped Serrano peppers into fine pieces *optional*
1/2 cup other veggies, sliced into very thin strips (carrots, bell peppers, etc) *optional*

Sauce
1/2 cup peanut butter, creamy (or, sub almond butter)
4 tablespoons hoisin sauce
2 tablespoons rice vinegar
3-5 tablespoons water (depending on how thick of a dipping sauce you would like)

Instructions:

Following these instructions exactly will provide the best results.

1. Prepare the vermicelli rice noodles by boiling them
 for 3-5 minutes.  Drain and set aside.  These should be al dente and not soggy.
2. Cut the tofu into thin and small rectangles, making sure to pat dry each strip.
3. In a fry pan, add sesame oil and warm over medium heat.  When the oil is hot, add the tofu and fry on all sides until golden brown.  This will take about 10 minutes.  Remove from fry pan and set aside.
4. To assemble spring rolls, add hot water to a skillet.  Keep the skillet on low heat until all spring rolls are assembled.
5. Prepare the first spring roll, by taking one rice wrapper and carefully soaking it in the hot water for about 5-7 seconds.
6. Transfer the soaked rice wrapper to a damp surface such as a cutting board or plate.  Make sure all edges are not folded over, and that you maintain the original circular shape.
7. In the bottom third of the wrapper, and a small handful of vermicelli noodles and layer the tofu, cilantro, mint, green onions, Thai basil, spinach, the optional serrano peppers, and the optional other vegetables.
8. Tuck in the left and right edges.  Then, from the bottom, gently roll all the fillings once over, making sure that the fillings stay together.  Finally, continue rolling to the end of the wrapper.  See this video if you need a visual!
9. Place the spring roll seam side down on a serving platter and cover with a damp paper towel.  Repeat steps 4-9, until all your fillings are used.
10.  Serve with the sauce, which is easily prepared by mixing the peanut butter, hoisin sauce, rice vinegar, and water together.  Alternatively, you can serve these with a sweet and sour sauce or a hot sauce of your choice.
11.  Enjoy!  If you have leftover spring rolls or will not be eating the rolls within the next couple of hours, individually wrap each spring roll in cellophane wrap and store in the fridge.


#halahbakes


Monday, May 4, 2020

Coconut Date Sehri Bars (Vegan, No Oil, Gluten Free)

Oh, coconut-y, date deliciousness!  These Coconut Date Sehri bars are flavorful and filling!  You don't even need to add chocolate.  But . . . chocolate added to the mix?  EPIC.  Making them requires some refrigeration, so plan to make these the night before breakfast.  Hoping you enjoy them as much as I did.


Ingredients:

1 and 1/2 cups old fashioned oats
1/3 cup maple syrup, agave syrup, or date puree
1 and 1/2 cups toasted unsweetened coconut
1/2 cup mixed nut butter (sub any type of nut butter)
1 cup deglet noor dates, soaked in water for 20 minutes
1/4 cup water
1/2 teaspoon salt
1 and 1/2 teaspoons vanilla
1/4 cup vegan chocolate chips *optional*


Instructions:

Following these instructions exactly will provide the best results.

1. To make the crust, blend the oats on low speed until the oats break into small pieces. Add the maple syrup into the blender until a sticky dough is formed.

2. Press the crust into an 9x5" baking dish (I used a glass dish - but recommend lining your pan with parchment paper if using a metal pan). Bake the crust for 15 minutes at 350 degrees. Remove the crust from the oven and cool.
3. In a blender, combine the soaked and drained dates, nut butter, salt, vanilla, and water until you have a thick paste.  
4. Pulse in the toasted coconut.
5. Spread the mixture on top of the crust base.
6. Refrigerate the bars for at least four hours.
7. *Optional* Melt the chocolate chips in a microwave at 30 second intervals until melted.
8. *Optional* Drizzle the tops of the bars with the melted chocolate.  Chill, until the chocolate sets.
9. Slice the bars and enjoy! Store leftovers in the fridge!


#halahbakes

Monday, December 24, 2018

Creamy Avocado and Chickpea Stuffed Sweet Potatoes (Vegan, No Oil)

Need an easy, delicious, and healthy dinner? Well, here it is!

These stuffed sweet potatoes are packed with flavor, loaded with chickpeas, and are awesomely avocadreamy (aka avocado - dreamy! :p get it?)!

Ingredients:

5 large sweet potatoes 
1/2 cup finely chopped red or white onion
1/2 cup finely chopped red bell peppers
1/3 cup chopped green onions
1 to 2 cups boiled or canned chickpeas
2 avocados
1/2 cup chopped cilantro
1/4 cup lemon juice
1/4 cup water
1-4 green chili peppers (according to taste)
1 tablespoon salt (or, according to taste)
1 teaspoon pepper (or, according to taste) 


Instructions:

Following these instructions exactly will provide the best results.

1. Wash and scrub the sweet potatoes.  Then, bake covered at 400 degrees until tender (about 1 hour).
2. Let the potatoes cool to a working temperature.
3. With a knife, trace and cut a large rectangle in the skin of one side of each potato.  Peel off the skin.
4. With a spoon or fork, scoop 2/3 of the insides of the sweet potato out and into a separate bowl (to be used in the filling).  Be gentle as you want to keep the shape of the sweet potato intact. 
5. In the separate bowl, mash the scooped sweet potato.
6. Add in the chopped onion, bell peppers, green onion, and chickpeas. Mix well and set aside.
7. In a blender, blend the avocado, cilantro, lemon juice, water, chili peppers, salt, and pepper until you get a smooth dressing. Note: this should taste salty as this dressing will be used to flavor the rest of the filling.
8. Combine the avocado dressing with the other ingredients.
9. Stuff the sweet potatoes with the filling.
10.  Serve either at room temperature or heated!  


#halahbakes

Monday, April 16, 2018

Coconut Date Magic Bars with Sesame (Vegan, No Oil, Gluten Free)

Magic bars are the best - but, I seriously couldn't imagine them without the ever-famous . . . condensed milk and chocolate. But, then, thankfully, I learned a cool trick for substituting condensed milk from Feasting on Fruit: blend 3 ripe bananas! With this tip, I then decided to sub out the chocolate for dates (because, honestly, dates are WAY better)! Hence, I am now able to share this incredibly tasty layered treat where you can save your evaporated milk and chocolate for a different day!

Ingredients:

1 and 1/2 cups old fashioned oats
1/3 cup maple syrup, agave syrup, or date puree
3 ripe bananas
3/4 cup chopped almonds
3/4 cup chopped dates
3/4 cup unsweetened shredded coconut
1/2 cup sesame seeds

Instructions:

Following these instructions exactly will provide the best results.

1. To make the crust, blend the oats on low speed until the oats break into small pieces. Add the maple syrup into the blender until a sticky dough is formed.

2. Press the crust into an 8x4" baking dish (I used a glass dish - but recommend lining your pan with parchment paper if using a metal pan). Bake the crust for 15 minutes at 350 degrees. Remove the crust from the oven and cool.
3. Blend the bananas until smooth.
4. Pour the banana puree on top of the crust.
5. Sprinkle the almonds on top of the banana puree, followed by the chopped dates.
6. Press the almonds and dates into the banana puree so that the banana puree rises up and covers the almonds and dates.
7. Sprinkle the coconut on top of the banana puree and gently press down - the banana puree does not need to cover the coconut completely, but should cover the coconut partially.
8. Finally sprinkle the sesame seeds on top of the coconut.
9. Bake for 40 minutes at 350 degrees.
10. Cool and then chill the bars in a refrigerator for at least 4 hours.

11. Slice the bars and enjoy! Store leftovers in the fridge!


#halahbakes

Saturday, April 14, 2018

Onion Thyme Quinoa Bread (Vegan, No Oil)

Oh, for the love of quinoa! If you aren't aware, quinoa is a popular super food and incredibly versatile!

The end result of this recipe is pretty darn tasty. Dip a slice of this bread in spaghetti sauce . . . and my, oh, my! 

Truth be told, I only began experimenting with quinoa flour because my mom bought some months ago and didn't know what to do with it. . .it turns out, you can do a lot. Moreover, you can cheaply make your own quinoa flour (with a spice grinder) - and, hey, why not save some bucks?

Ingredients:

2 cups quinoa flour
1 cup all purpose flour
1 teaspoon baking soda
1 teaspoon baking powder
3/4 teaspoon salt
1 tablespoon thyme
1 tablespoon onion powder
2 cups almond milk
1 tablespoon vinegar (any type)

Optional Ingredients:
3/4 teaspoon cayenne pepper (for a spicy bread)
3 tablespoons olive oil (for enhanced texture)


Instructions:

Following these instructions exactly will provide the best results.

1. In a large bowl, combine the quinoa flour, all purpose flour, baking soda, baking powder, salt, thyme, onion, powder, and cayenne pepper (optional).

2. In a small to medium bowl, combine the almond milk, vinegar, and oil (optional).
3. Pour the almond milk and vinegar mixture into the dry ingredients and mix well (there should be no clumps of flour).
4. Transfer the dough into a greased 8x5" loaf pan. You can also consider using parchment paper in the pan if you prefer to use no oil.
5. Lightly cover the pan with aluminum foil.
6. Bake for 30 minutes at 400 degrees with the aluminum foil covering the pan.
7. Remove the aluminum foil and bake the bread for an additional 30 minutes (totaling 60 minutes of bake time).
8. Remove the bread from the oven, let cool, remove from the pan, and slice.
9. Enjoy and refrigerate any leftover slices in a plastic container in the fridge.


#halahbakes

Tuesday, March 20, 2018

Ghost Pepper Hummus (Vegan, No Oil)

Spicy? Heck yes! Delicious? Most definitely. Easy? Did you even have to ask?!

Best of all - you can leave out the ghost peppers or substitute a less spicy pepper and perfect this hummus for your spice tolerance level.

Ingredients:

3 cups boiled or canned chickpeas (I like boiled better!)
1/2 teaspoon citric acid (you could also sub 2 tablespoons lemon juice)
1 teaspoon sea salt
2 cloves garlic
2 tablespoons sesame seeds
1/3 to 1/2 cup water
2 ghost peppers (or sub any other type of pepper based on your spice tolerance)


Instructions:

Following these instructions exactly will provide the best results.

1. In a food processor, combine all of the ingredients (but, only 1/3 cup of water).

2. Process until the hummus is smooth in texture. If the hummus is not yet creamy in texture, add more water.
3. Adjust ingredients according to taste -although, most people love this without adjustments.
4. Enjoy right away or store in an airtight container in the fridge for up to 5 days.

#halahbakes

Friday, February 9, 2018

Turmeric, Sesame, and Nigella Bread

Ah, how I love Indian (desi) flavors and spices. I created this bread to spice up my sandwich world. I also wanted to see how much turmeric I needed to make a beautiful (yet, still tasty) loaf! The answer: not much! Baker be warned: too much turmeric alters the flavor, so it is better to stick with less!

This recipe like many of my other bread recipes requires a cast iron pan (containing boiling water) to be used under the tray used for baking the bread. Following this technique is a good idea as you will get a soft and moist bread with a crunchy crust!


Ingredients:

2 tablespoons yeast
1 and 1/2 cups water
3 cups all purpose flour
2 tablespoons salt
1 to 2 tablespoons turmeric (depending on your desired color -any more will likely start to alter flavor)
1/4 cup sesame seeds
1/4 cup nigella seeds (these are also called kalonji)
Additional flour for dusting
4 cups of water for boiling (not to be used in bread)


Instructions:

Following these instructions exactly will provide the best results.

1. 
Combine water (about 110 degrees - the temperature of bath water) with yeast and let set for 5 minutes to get foamy. If your yeast does not get foamy, this means your water was too hot and/or that your yeast is no longer active.
2. In a large bowl, combine the all purpose flour, salt, turmeric, sesame seeds, and nigella seeds. Mix the dry ingredients well.
3. Add in the foamy yeast water and knead the dough until thoroughly mixed. Knead for about five minutes.
4. Cover the bowl with plastic wrap and let the dough rise in a warm place for 1 hour.
5. Once the dough has doubled in size, lightly sprinkle the dough with additional flour and transfer to a generously floured work surface. Knead the dough a few times and add flour or water as needed (such that the dough is slightly tacky, but I would not mess around with the proportions of the current recipe too much).
6. Roll your dough into a ball and place on a baking sheet. Sift a light coating of flour over the top to help keep the dough moist. Let the dough sit for 5 to 10 minutes.
7. Preheat your oven to 450°F, fill a metal or cast iron pan (not glass, Pyrex, or ceramic) with the 4 cups of water, and place on the lowest oven rack.
8. When the oven is ready, slash the bread 2 or 3 times with a knife or blade, making a cut about 1/2 inch deep. *If desired, sprinkle sesame / nigella seeds in the slashes for the "look" seen in the pictures.
9. Place the bread tray on the middle rack, above the rack with the pan now containing boiling water. Close the oven door quickly.
10. Bake the bread for 35-45 minutes or until golden brown and crusty.
11. Remove the bread from the oven and cool. Enjoy! Once fully cooled, store leftovers in a plastic bag at room temperature.


#halahbakes
Wednesday, January 24, 2018

Savory Pear and Walnut Bread

I am in love! In love with what? The slightly sweet tang of pear and crunchiness of walnut that you taste when you take a bite out of this bread. Love. Love. Love. Try it out my friends. You won't regret it.

This recipe like many of my other bread recipes requires a cast iron pan (containing boiling water) to be used under the tray used for baking the bread. Following this technique is a good idea as you will get a soft and moist bread with a crunchy crust!


Ingredients:

2 tablespoons yeast
1 and 1/2 cups water
3 and 1/4 cups all purpose flour
2 tablespoons salt
2 tablespoons cinnamon
1 peeled and diced pear
1/2 cup chopped walnuts
Cinnamon for topping
Additional flour for dusting
4 cups of water for boiling (not to be used in bread)


Instructions:

Following these instructions exactly will provide the best results.

1. 
Combine water (about 110 degrees - the temperature of bath water) with yeast and let set for 5 minutes to get foamy. If your yeast does not get foamy, this means your water was too hot and/or that your yeast is no longer active.
2. In a large bowl, combine the all purpose flour, salt, and cinnamon. Mix the dry ingredients well.
3. Add in the foamy yeast water and knead the dough until thoroughly mixed.
4. Add in the diced pear and walnuts. Knead for another five minutes until thoroughly mixed. 
5. Cover the bowl with plastic wrap and let the dough rise in a warm place for 1 hour.
6. Once the dough has doubled in size, lightly sprinkle the dough with additional flour and transfer to a generously floured work surface. Knead the dough a few times and add flour or water as needed (such that the dough is slightly tacky, but I would not mess around with the proportions of the current recipe too much).
7. Roll your dough into a ball and place on a baking sheet. Sift a light coating of flour over the top to help keep the dough moist. Let the dough sit for 5 to 10 minutes.
8. Preheat your oven to 450°F, fill a metal or cast iron pan (not glass, Pyrex, or ceramic) with the 4 cups of water, and place on the lowest oven rack.
9. When the oven is ready, slash the bread 2 or 3 times with a knife or blade, making a cut about 1/2 inch deep. *If desired, sprinkle cinnamon in the slashes for the "look" seen in the pictures.
10. Place the bread tray on the middle rack, above the rack with the pan now containing boiling water. Close the oven door quickly.
11. Bake the bread for 35-45 minutes or until golden brown and crusty.
12. Remove the bread from the oven and cool. Enjoy! Once fully cooled, store leftovers in a plastic bag at room temperature.


#halahbakes

Friday, January 19, 2018

Purple Sweet Potato Bread (Vegan)

I always have admired breads gushing with natural color. So I tried it out and hooray! This is it! I purchased purple sweet potatoes from my local Asian market, boiled them, mushed them, and added them into my go-to bread recipe. And, bam! Purple, moist, crunchy-crusted, soft, and delicious bread! Note: the sweet potato flavor is very light in this recipe. If you are looking for more of a sweet potato flavor or for a darker purple color, you may want to experiment with this recipe by altering the almond milk to sweet potato ratio.

As with my last recipe post for Onion and Pepper Bread, this recipe does require an extra deep dish pan to boil water. This  pan will go below the baking tray to create steam. Thus, you get the amazing crispy crust on your bread, but a totally soft inside! 


Ingredients:

2 tablespoons yeast
1 and 1/2 cups almond milk (or any other milk)
2 cups whole wheat flour
1 and 1/4 cups unbleached all purpose flour
2 tablespoons salt
2 cups boiled, peeled, and mushed purple sweet potato
Additional flour for dusting
4 cups of water for boiling (not to be used in bread)


Instructions:

Following these instructions exactly will provide the best results.

1. 
Combine almond milk (about 110 degrees - the temperature of bath water) with yeast in a large mixing bowl and let set for 5 minutes to get foamy. If your yeast does not get foamy, this means your almond milk was too hot and/or that your yeast is no longer active.
2. In a large bowl, combine the whole wheat flour, all purpose flour,  and salt. Mix the dry ingredients well.
3. Add in the foamy yeast milk and knead the dough until thoroughly mixed.
4. Add in the mushed sweet potato. I recommend mushing the sweet potato in a food processor so that you don't have large chunks of potato in your bread. Knead for another five minutes until the sweet potato is thoroughly mixed in with the dough. 
5. Cover the bowl with plastic wrap and let the dough rise in a warm place for 1 hour.
6. Once the dough has doubled in size, lightly sprinkle the dough with additional flour and transfer to a generously floured work surface. Knead the dough a few times and add flour or water as needed (such that the dough is slightly tacky, but I would not mess around with the proportions of the current recipe too much).
7. Roll your dough into a ball and place on a baking sheet. Sift a light coating of flour over the top to help keep the dough moist. Let the dough sit for 5 to 10 minutes.
8. Preheat your oven to 450°F, fill a metal or cast iron pan (not glass, Pyrex, or ceramic) with the 4 cups of water, and place on the lowest oven rack.
9. When the oven is ready, slash the bread 2 or 3 times with a knife or blade, making a cut about 1/2 inch deep.
10. Place the bread tray on the middle rack, above the rack with the pan now containing boiling water. Close the oven door quickly.
11. Bake the bread for 35 to 45 minutes or until golden brown and crusty.
12. Remove the bread from the oven and cool. Enjoy! Once fully cooled, store leftovers in a plastic bag at room temperature.


#halahbakes

Friday, January 12, 2018

Onion and Pepper Bread (Vegan)

Of all the breads to bake, this is the one! This savory and crunchy crusted bread has the perfect texture and levels of moisture. It is hard to go wrong (in fact, I have successfully pulled off the same great taste when I accidentally baked the bread 1o minutes longer than I had planned!).

This recipe does require an extra deep dish pan to boil water. This  pan will go below the baking tray to create steam. Thus, you get the amazing crispy crust on your bread, but a totally soft inside! After this, you can call yourself an artisan bread baker! ;)


Ingredients:

2 tablespoons yeast
1 and 1/2 cups warm water
2 cups whole wheat flour
1 and 1/4 cups unbleached all purpose flour
2 tablespoons salt
1/2 cup old fashioned oats
1 bell pepper diced into small pieces (any color)
1/2 onion diced into small pieces
1 teaspoon black pepper
1 teaspoon cayenne pepper (if desired)
1 chopped chili pepper or ghost pepper (if desired)
1 tablespoon flax seed powder (if desired)
Additional flour for dusting
4 cups of water for boiling (not to be used in bread)


Instructions:

Following these instructions exactly will provide the best results.

1. 
Combine warm water (about 110 degrees) with yeast in a large mixing bowl and let set for 5 minutes to get foamy. If your yeast does not get foamy, this means your water was too hot and/or that your yeast is no longer active.
2. In a large bowl, combine the whole wheat flour, all purpose flour, salt, old fashioned oats,  black pepper, cayenne pepper (if desired), and flax seed powder (if desired). Mix the dry ingredients well.
3. Add in the foamy yeast water and knead the dough until thoroughly mixed.
4. Add in the diced bell pepper, onions, and chili peppers (if desired). Knead the dough for another five minutes.
5. Cover the bowl with plastic wrap and let the dough rise in a warm place for 1 hour.
6. Once the dough has doubled in size, lightly sprinkle the dough with additional flour and transfer to a generously floured work surface. Knead the dough a few times and add flour as needed (such that the dough no longer sticks to your fingers, but not too much as this can dry out your bread).
7. Roll your dough into a ball and place on a baking sheet. Sift a light coating of flour over the top to help keep the dough moist. Let the dough sit for 5 to 10 minutes.
8. Preheat your oven to 450°F, fill a metal or cast iron pan (not glass, Pyrex, or ceramic) with the 4 cups of water, and place on the lowest oven rack.
9. When the oven is ready, slash the bread 2 or 3 times with a knife or blade, making a cut about 1/2 inch deep.
10. Place the bread tray on the middle rack, above the rack with the pan now containing boiling water. Close the oven door quickly.
11. Bake the bread for 35 minutes or until golden brown and crusty.
12. Remove the bread from the oven and cool. Enjoy! Once fully cooled, store leftovers in a plastic bag at room temperature.


#halahbakes

Friday, December 29, 2017

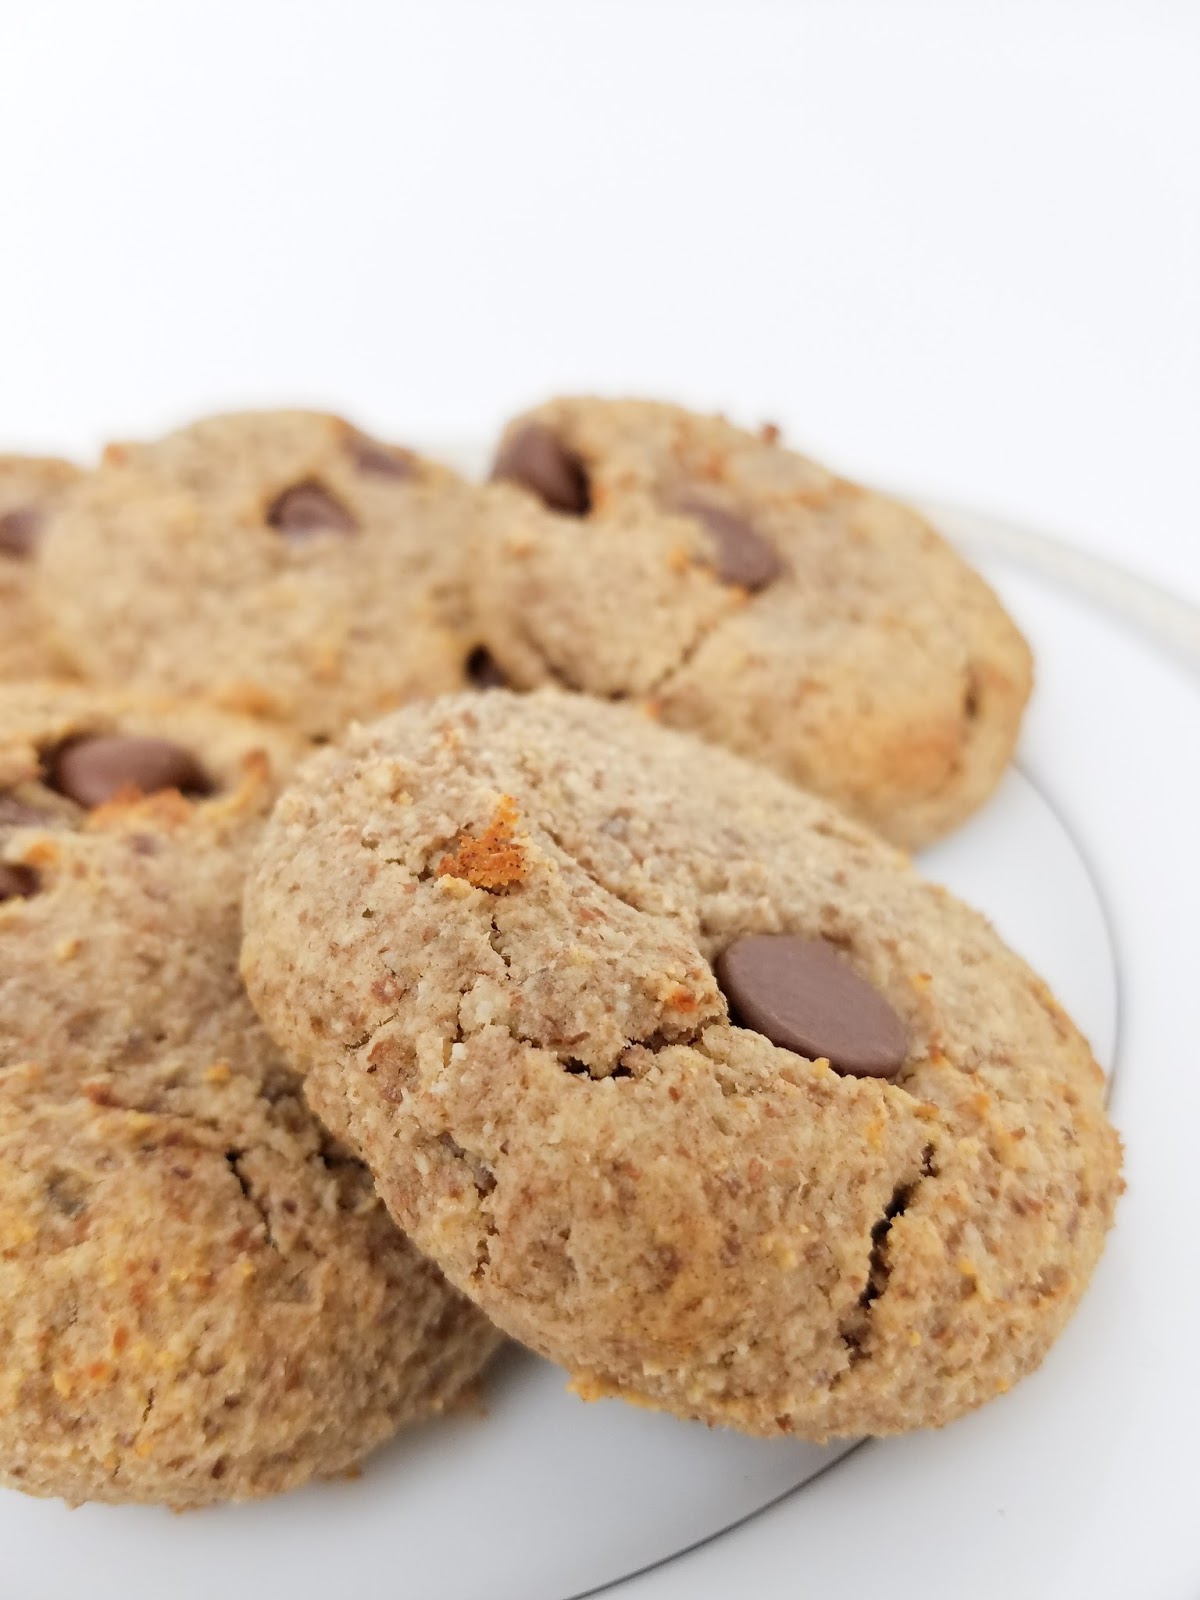
Chocolate Chip Almond Flour Cookies (Vegan, Gluten Free, Diabetic Friendly)

Thanks again to Feasting on Fruit for your incredible creativity. These cookies are sweet, soft, and date-I-say-it . . . "healthy." [You see what I did there?] The cookie base is sweetened with medjool dates. I played around with the recipe too and discovered that you don't even need chocolate chips. You can leave them out completely or substitute raisins.

P.S. I also tried making these without baking soda -- the recipe still works, but the cookies end up looking more like meat patties than cookies. Stick to using the baking soda!

Give these a try and let me know how you like them!

Ingredients:

12 pitted medjool dates
2/3 cup water
3 cups almond flour
1/2 cup peanut butter (you can find numerous brands without sugar)
1 teaspoon baking soda
2 teaspoons vanilla extract
1/4 teaspoon salt
1/2 cup vegan chocolate chips (or sub raisins)


Instructions:

Following these instructions exactly will provide the best results.

1. In a blender, blend the medjool dates with the water until you have a smooth date paste.
2. In a separate bowl, stir the date paste, almond flour, peanut butter, baking soda, vanilla extract, and salt until well mixed.

3. Stir in the chocolate chips.
4. Scoop out a heaping tablespoon worth of dough and roll into a ball. Place on a baking sheet lined with parchment paper. Press down to flatten.
5. Repeat with the remaining dough. Leave about 1/2 inch to 1 inch between the cookies.
6. Bake the cookies for 10 to 12 minutes at 350 degrees. The cookies will just start to turn golden brown.
7. Let the cookies cool for at least 10 minutes before eating!

8. Enjoy!

#halahbakes