Search This Blog

Showing posts with label vegan. Show all posts

Tuesday, July 14, 2020

Roasted Cumin Biscuits (Zeera Biscuits) - Vegan*

These Roasted Cumin Biscuits are well-known in India/Pakistan as Zeera or Jeera Biscuits.  These lightly sweet, salty, crunchy, crumbly and crispy biscuits are often served with chai or tea.  Dip in your chai . . . drool!

Please note that "biscuits" or "cookies" in India/Pakistan are not as sweet and are meant to be crispy/crunchy . . . so, if you are looking for a softer and more "American-friendly" cookie - - - check out some of my other cookie recipes here.


Ingredients:

1 tablespoon cumin seeds
1 cup all purpose flour
1/2 cup unsalted butter, melted (if vegan*, sub coconut oil)
2 tablespoons granulated sugar
1/2 teaspoon salt
1 tablespoon water, if required


Instructions:

Following these instructions exactly will provide the best results.

1. In a pan, dry roast the cumin seeds on a skillet over medium heat until fragrant.  This takes about 2 minutes.  Set aside.
2. Sift the flour into a large mixing bowl.  Stir in the roasted cumin seeds, sugar, and salt.
3. Add in the melted (warm, but not hot) butter to the flour.  Mix with your hands and rub the butter throughout the flour.  Gently bring the dough together into a ball.  If the dough is too dry, you can sprinkle some water into the mixture, but be careful not to add too much.
4. Shape the dough into a disc shape and wrap in saran wrap.  Refrigerate the dough for half an hour.
5. Remove the dough from the refrigerator and place it between 2 pieces of parchment paper.  With a rolling pin, roll the dough out to a 1/4 inch thickness.  Cut out circles with a cookie cutter or a glass.  (I used a 1/4 cup measuring cup as my "cutter").  Transfer the biscuits onto a baking sheet, making sure the biscuits are at least 1 inch apart.
6. Collect the scraps, form a ball and repeat step #5 until all the scraps are used.
7. Bake the biscuits for 15-18 minutes at 350 degrees.  Let the biscuits cool for at least 5 minutes before moving the biscuits off the baking sheet.  The biscuits will firm up further as they cool.  
8. Cool for at least another 20 minutes before eating.  Patience is key!
9.  Enjoy with chai!  Store extra biscuits in an airtight container at room temperature for about a week.


#halahbakes

Tuesday, July 7, 2020

Korean-Inspired Spicy-Braised Tofu - Dobu Jorim (Vegan)

My husband and I had a short 24 hour stop-over in South Korea pre-COVID.  We loved the flavors and regretted that our stop-over was so short.  After being trapped at home for far too many months now because of COVID, we have made tons of Korean-inspired recipes.  This one was by far the easiest and most delicious!  

This dish comes out savory, spicy, and crunchy.  It is best served with rice.  Overall, the spices and garnishes are simple, but incredibly flavorful.

The hardest part of this recipe is finding Korean Hot Pepper Powder, a flaky and bright-red hot pepper powder that doesn't taste like a typical chili pepper powder.  You can find this powder at your local Asian Market.  I found mine at H-Mart.


Ingredients:

1 package extra-firm tofu
3 tablespoons canola oil
1 teaspoon, crushed garlic
1/2 cup onion, diced into small pieces
3 green onions, chopped (set aside a tablespoon for garnish)
1 and 1/2 tablespoons soy sauce
1 teaspoon sugar
1 tablespoon hot pepper flakes (found at your local Asian market)
1/2 cup water
1 teaspoon toasted sesame oil
1 tablespoon toasted sesame seeds

Instructions:

Following these instructions exactly will provide the best results.

1. Rinse and drain tofu.  Pat dry the tofu.

2. Cut the tofu into bite sized pieces that are 1/4 inch thick.  Pat dry the tofu pieces again.
3. In a fry pan, add the canola oil to the pan and heat up the oil over high heat.
4. Add in the tofu piece by piece, making sure none of the pieces touch.  Don't move the pieces for about 8 minutes so that the bottoms of the tofu become crunchy.  Flip each piece over one by one with a spatula and let the tofu cook for another 8 minutes.  Remove each piece of tofu after each piece is crispy and golden brown.  Set aside.
5. In a small bowl, combine the soy sauce, sugar, hot pepper flakes, and water.   Set aside.
6. In the same pan with the leftover oil and over medium high heat, add the chopped onion, garlic, and green onion.  Stir until the onion gets golden brown.
7. Add in the sauce and stir for about 3-4 minutes or until the sauce thickens.
8. Add the tofu and braise for about 1-2 minutes.
9. Add the toasted sesame oil and stir.
10. Transfer the tofu to a serving dish and garnish with the toasted sesame seeds and remaining chopped green onion.
11. Enjoy right away with warm rice. Store any leftovers in an airtight container in the fridge for up to 5 days.


#halahbakes

Tuesday, June 30, 2020

Roasted Sesame Tahini Cookies (Vegan, Gluten Free)

These cookies are slightly sweet, slightly savory, and perfect with some tea or coffee.  Coated with roasted sesame seeds, you've got yourself a hit!

Easily make soft cookies by baking for 8 minutes, or make these crunchy by baking for 10 minutes.  If you aren't vegan, I highly recommend using honey so that you can experience the wonderful combination of honey and tahini.  If you are vegan, you can almost match the goodness with some agave syrup.  Enjoy!


Ingredients:

1 and 1/2 cups almond flour
1/2 teaspoon baking soda
1/4 teaspoon sea salt
1/3 cup tahini
1/3 cup honey (if vegan: sub agave syrup)
1 teaspoon vanilla
1/2 cup roasted sesame seeds


Instructions:

Following these instructions exactly will provide the best results.


1. In a mixing bowl, combine almond flour, baking soda, and salt.

2. Add the tahini, honey, and vanilla.  Mix well to form a thick dough.
3. Scoop a rounded teaspoon of dough into a ball.  Coat the ball in sesame seeds.  Repeat.
4. Arrange the sesame seed balls on an ungreased cookie sheet, making sure each cookie is about 2 inches apart.  Gently flatten the tops of the balls of dough with your fingers so that the balls become 1/2 inch-thick rounds.
5. Bake the cookies for 8 minutes at 350 degrees for a softer cookie.  Bake the cookies for 10 minutes at 350 degrees for a crispier cookie.  (I personally like the softer cookie better, but both are delicious).
6. Remove the cookies from the oven and let rest for five minutes.  Resist the urge to touch the cookies or, otherwise, they might break! 
7. Gently remove the cookies from the cookie sheet with a fork or thin spatula.
8. Enjoy!  Store any leftovers in an airtight container in the fridge for about a week (tasting best by warming up in the microwave or oven).


#halahbakes

Saturday, June 20, 2020

Indian Cashew Fudge - Kaju Katli (Vegan*, Gluten Free)

I am getting back to my roots today with this recipe for Kaju Katli, or Indian Cashew Fudge.  It is delicious, very easy to make, and a total hit!  You will only need 5 ingredients and you can easily make this vegan by omitting the ghee or by substituting coconut oil for the ghee.  

That said, ghee really enhances the flavor . . . so I highly encourage you to use it if you aren't strictly vegan.  

Btw, this recipe doesn't use an oven, but does require upper arm strength.  Sometimes you have to earn your desserts.  :p


Ingredients:

1 cup whole cashews
1/2 cup granulated sugar
1/4 cup water
1/2 teaspoon rose water  (you can purchase this at your local Indian, Middle Eastern, or Halal grocer)
1 teaspoon ghee (if vegan*, omit the ghee entirely or sub coconut oil)


Instructions:

Following these instructions exactly will provide the best results.

1. In a nut/spice grinder, grind the cashews into a fine dry powder.  Do not over grind or the mixture will become oily.  You can also use a food processor or blender, but you'll end up having small chunks of cashews that you'll have to sieve out.  Set aside the dry cashew powder.
2. In a saucepan over medium heat, combine the water, sugar, and rose water.  Mix well and until the sugar melts.  After the sugar melts, allow the sugar water to boil for about 1-2 minutes before turning down the heat to low.
3. Add in the cashew powder and stir, stir, and stir.  You do not want any lumps.
4. Add in the teaspoon of ghee.  And, continue to stir, stir, and stir.
5. Keep stirring for about 15 minutes or until the dough lumps together and leaves the sides of the pan.  Your arm should be tired by the end of this. ;) 
6. Once the dough lumps together and leaves the sides of the pan, remove the saucepan from the heat.
7. Using the spatula, transfer the hot dough to parchment paper.
8. Wait about five minutes for the dough to cool down before you touch it by hand, but don't wait too long as you need to knead the dough while it is hot/warm.
9.  Once you can comfortably touch the dough without burning yourself, knead the dough by hand until smooth/shiny.  Kneading will take about 4-5 minutes.  If your dough looks dry, sprinkle some water on top (but, you probably won't need to if you follow the measurements correctly).
10. Roll the dough into a log and place another piece of parchment paper on top of the log.  (You will have parchment paper on the bottom and on the top now).
11. With a rolling pin, evenly roll the dough to a 1/4 inch thickness.
12. Cut the dough into 1 inch square or diamond shapes.
13. Enjoy!  If you have any leftovers, store the kaju katli in an airtight container for up to a week.


#halahbakes

Thursday, June 11, 2020

One-Bowl Banana Bread with Walnuts (Vegan)

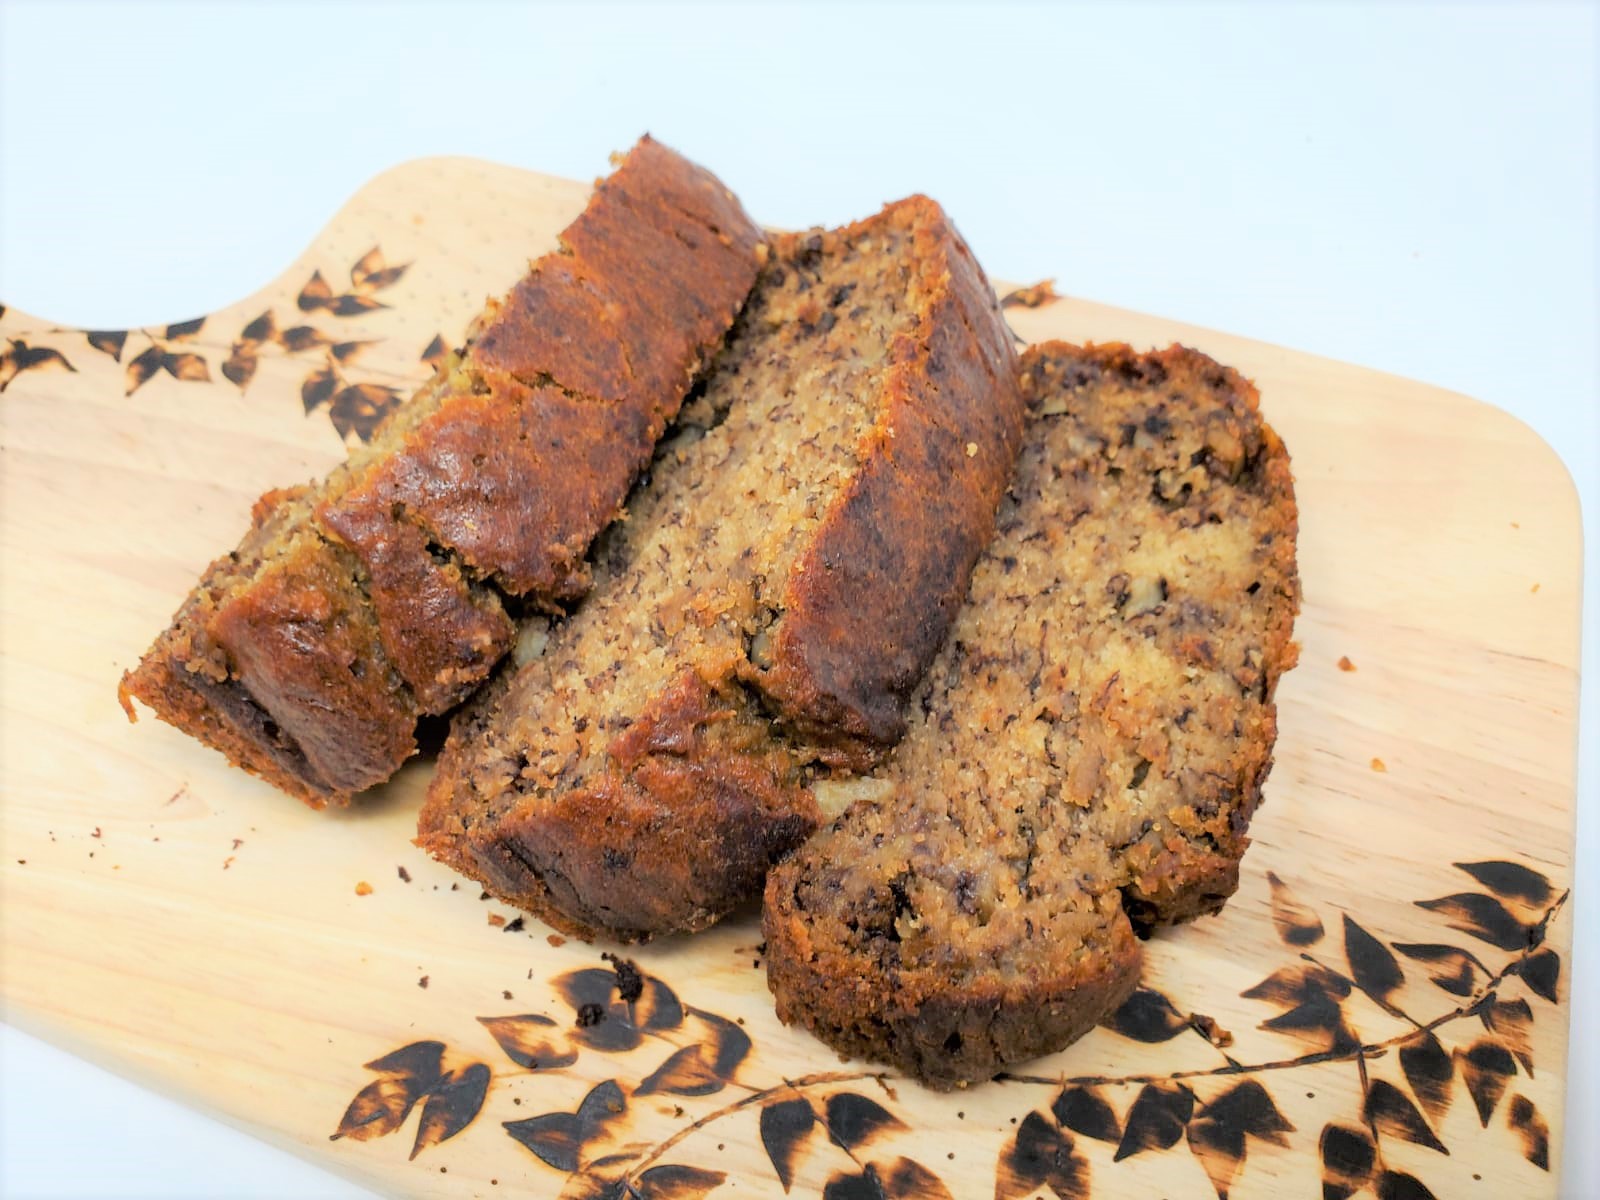
Too many ripe bananas is always a good thing in my opinion.  I either chop them up and freeze them for smoothies/ "nice cream" or make. . . banana bread!  This recipe is easy, nutty, and perfectly moist with an occasional walnut crunch.  You can't really go wrong with this recipe as you are 1. getting rid of those too ripe bananas; 2. making only one bowl dirty (less dishes, hooray!); and, 3. ending up with a delicious loaf to enjoy alone or with your favorite plant butter.  

Hate walnuts? Omit them or substitute a different nut.  Don't be afraid to experiment - sub coconut, raisins, or chocolate chips!

Want a healthier version?  Check out my No Sugar No Oil Banana Bread with Chopped Apricots.  Super delicious, without the guilt!


Ingredients:

1 tablespoon flax seed meal
3 tablespoons water
1/3 cup coconut oil, melted
3 overripe bananas, mashed (spottier and riper = better)
1/3 cup brown sugar
1/3 cup granulated sugar
1 teaspoon vanilla extract
1 teaspoon baking soda
1/4 teaspoon salt
1 and 1/2 cups all purpose flour
1/2 cup walnuts, chopped (sub another nut or omit)


Instructions:

Following these instructions exactly will provide the best results.

1. In a bowl, prepare your flax egg by combining the flax seed meal with water.  Let sit for five minutes.
2. Add the melted coconut oil, mashed bananas, brown sugar, granulated sugar, vanilla, baking soda, and salt.   Mix well.
3. Add the flour in 1/2 cup increments, mixing just enough to blend the ingredients.  There is no need to over-mix.
4. Add the chopped walnuts and mix.
5. Pour the batter in a 9x5 greased loaf pan (you can also use parchment paper).  
6. Bake at 350 degrees for 60-65 minutes or until a toothpick inserted into the loaf comes out clean.
7. Remove from the oven and allow the loaf to cool for at least 30 minutes, prior to removing from the pan.
8. Remove from the pan and slice with a bread knife.
9.  Enjoy alone or with your favorite plant butter!  If you have any leftovers, store in an airtight container in the fridge for up to a week.


#halahbakes

Monday, June 8, 2020

No-Bake Cashew Dream Bars (Vegan, Dairy-Free, Soy-Free)

These bars are smooth and sweet with a hint of vanilla and lemon.  And, the date-sweetened pecan crust adds just the right amount of crunch.  Dreamy, am I right?  

Besides the ingredients, you'll need a food processor/blender, 5X8 dish, and a freezer.  No baking required!  The hardest part about this recipe is digging in too early -- and there's nothing wrong with that. ;)  But, as with many things, patience yields the best result.


Ingredients:

For the crust:
4 pitted dates
3/4 cup pecan halves
1 tablespoon coconut oil
1/8 teaspoon salt
2 teaspoons agave syrup (sub maple syrup)

Remaining ingredients:
2 cups raw cashews, soaked overnight
1/2 cup water (sub coconut milk for extra creaminess)
1/3 cup agave syrup (sub maple syrup)
1/3 cup coconut oil, melted into liquid form
 --Note: do not sub any other type of oil as this is what keeps the bars solid
1/4 cup lemon juice
2 teaspoons vanilla extract
1 teaspoon lemon zest *optional*


Instructions:

Following these instructions exactly will provide the best results.

1. Prepare the crust: In a food processor/blender, blend the dates until they are broken down into small pieces.  Add in the pecan halves, coconut oil, salt and agave syrup and process until the mixture is sticky (about 30 seconds).
2. In a 5x8 dish, lined with parchment paper, press the pecan-date crust mixture evenly into the bottom of the lined dish.  Note: you could probably pull off no parchment paper, but parchment paper helps keep the crust together upon removal from the dish. 
3. Place the dish/crust into the freezer to set while working on the next steps.
4. Rinse and drain the soaked cashews.
5. In a food processor/blender, blend the soaked cashews, water, agave syrup, coconut oil, lemon juice, vanilla extract, and optional lemon zest for 3 to 5 minutes and until the mixture is smooth.
6. Pour the creamy cashew mixture onto the crust and evenly spread throughout with a spatula.  Gently tap the dish against a counter or hard surface for an even smoother top.
7.  Freeze the bars for 4-5 hours.
8.  When you are ready to eat the bars, cut the bars into squares immediately after removing the bars from the freezer.
9.  Remove the number of bars you plan to serve from the dish to a serving dish and allow them to rest at room temperature for 20 minutes (unless you're into the ice cream thing).  If you aren't serving all of the bars, place the extra bars in an airtight container (to avoid freezer burn) and refreeze for up to a few weeks.
10.  Serve with your favorite fruits and enjoy!  If you have leftover thawed bars, refrigerate the bars in an airtight container for up to 5 days.

#halahbakes

Thursday, June 4, 2020

Colorful Chickpea California Rolls (Vegan, Oil-Free)

These Colorful Chickpea California Rolls make an easy, delicious, and nutritious dinner.  They are veggie-packed, tasty, and satisfying!  Just like my Crispy Tofu Spring Rolls, this recipe is wonderful for using up leftover veggies in your fridge!  Ingredients are limitless.  You can put in almost any variety of veggies or easily make these non-vegan (highly recommend cucumber, smoked salmon, and cream cheese). 


Ingredients:

For the rice:
1 cup sushi rice (Japanese short-grain rice)
1 and 1/4 cup water (you may need more)
3 tablespoons rice vinegar
1 tablespoon soy sauce

Remaining Ingredients (Sub/Add as you please)
4-6 Nori Sheets (you can find these at your local Asian market)
1 bell pepper, thinly sliced (your choice of color)
1 carrot, thinly sliced
1/2 cucumber, thinly sliced
2 green onions, thinly sliced
1 cup boiled or canned chickpeas
2 tablespoons sriracha
2 tablespoons mustard

For serving *optional*
Soy sauce
Pickled ginger
Pickled radish
Wasabi
Sesame Seeds

Instructions:

Following these instructions exactly will provide the best results.

1. Prepare the rice:  Start by rinsing and draining the rice three times.  Place the rice in a saucepan and add the water so that the water is about a 1/2 inch higher than the rice line.  Cook over medium heat until the rice is cooked and the water has evaporated.  Remove from heat.

2. While the rice is still warm, add in the rice vinegar and soy sauce.  Mix the rice with a fork until the rice is well mixed.  It should be sticky.  Set aside.
3.  Prepare the chickpea filling:  In a bowl, mash the chickpeas with a fork.  Add in the sriracha and mustard and mix well.  Set aside.
4. To assemble California rolls, place a nori sheet on a dry surface or plate.  The rough side should be facing up and the smooth side should be facing down.
5.  With a spoon, gently spread the sushi rice over the nori, leaving 1 inch at the top of the nori bare.  Make sure the layer of sushi rice is thin.
6. In the bottom third of the nori closest to you, gently spread a tablespoon or two of the chickpea mixture in a straight line.  Then, lay a thin slice of bell pepper, carrot, cucumber, and green onion in a straight line over the chickpea mixture.
7.  With dry hands, begin rolling the nori and rice over the vegetables and chickpea mixture.  Before continuing rolling, make sure the veggies are compressed fairly tightly within the first roll.  Then, continue rolling upwards.  Place the final California roll seam-side down.  Repeat.
8. Once you are ready to serve, gently slice the California rolls into 1 inch pieces with a serrated knife (slow saw motions work best).
9.  Serve the California rolls with the optional soy sauce, pickled ginger, pickled radish, wasabi, and sesame seeds.
10.  Enjoy!  Although, these are best eaten fresh, you may store leftover California rolls in an airtight container in the fridge for 1-2 days.


#halahbakes


Sunday, May 31, 2020

Rose Orange Blossom Pudding - Mahalabia (Vegan, Dairy-Free)

This pudding is a veganized version of the Middle Eastern Muhallebi/ Mahalabia/ Mehalabya!   This pudding is usually made with milk and cream so I really challenged myself to find a good alternative.  With research, I found that the best alternative milk to use is rice milk as it allows for a creamy texture.  I also found that coconut cream added a richness that made this pudding extra delicious!

The traditional flavors are usually rose water (my personal favorite) or orange blossom water.  You can find both of these waters at your local Middle Eastern, Halal, or Indian grocery store.  If you can't find these or aren't a fan of those flavors, you can easily Americanize this by adding in vanilla instead of rose water or orange blossom water.  


Ingredients:

4 cups rice milk (divided into 1 cup and 3 cups)
3/4 cups granulated sugar
8 tablespoons cornstarch
1 can coconut cream
2 cardamom pods *optional*
1 tablespoon rose water (or, sub orange blossom water)
--Note: both can be found at your local Middle Eastern, Halal, or Indian grocery store
Nuts, Fruits, Toasted Coconut, Rose Syrup *optional*


Instructions:

Following these instructions exactly will provide the best results.

1. In a bowl, combine 1 cup of the rice milk with the cornstarch.  Mix into a smooth paste.  Set aside.
2. In a saucepan, whisk the remaining 3 cups of rice milk, granulated sugar, coconut cream, and optional cardamom pods.  Bring this mixture to a boil over medium heat while stirring slowly and consistently.
3. Slowly add in the cornstarch mixture, making sure to stir vigorously.
4. Continue stirring slowly and consistently for 12-15 minutes and until the mixture thickens.
5. Remove the pudding from the stove and stir in either 1 tablespoon of rose water or 1 tablespoon of orange blossom water.  *I personally enjoy the flavor of rose water more. **Also, don't get carried away with the rose water / orange blossom water...a little goes a long way!
6. Divide the pudding into small serving bowls or glasses.  Let cool for 15 minutes and top each serving bowl/glass with saran wrap (this prevents a pudding shell from forming on top).
7.  Refrigerate the pudding for 4+ hours and until set.
8.  Enjoy by serving and eating with nuts, toasted coconut, rose syrup, or your favorite fruit!  If you have any leftovers, these are stored well in the fridge, with saran wrap, for up to 3-5 days (as long as there is no fruit on top).

#halahbakes

Friday, May 29, 2020

Cheater Chocolate Mousse (Vegan)

Veganizing a tasty chocolate mousse is actually easier than you thought!  You'll need three ingredients, a blender, and refrigerator.  That's it.  Not only does this chocolate mousse taste delicious with fruits, toasted nuts, and toasted coconut, but it also can be used as a pie filling.  Ultimately though, this mousse is so easy to make that it feels like you are cheating on the real chocolate mousse!


Ingredients:

1 package silken tofu at room temperature 
Notes: --it MUST be silken
             --firm silken tofu gives you a thicker mousse
             -- soft silken tofu gives you a lighter mousse
1/2 cup dairy-free chocolate, melted
1 tablespoon agave syrup (or, sub maple syrup)
Nuts, Fruits, Coconut *optional*


Instructions:

Following these instructions exactly will provide the best results.

1. Drain the room temperature silken tofu and pat dry.
2. In a blender, blend the silken tofu, melted chocolate, and agave syrup until smooth.
3. Pour the mousse into your desired container(s) and refrigerate for at least 2 hours.
4. Decorate the mousse with your favorite toppings like fruits, nuts, or coconut.
5. Enjoy!  If you have any leftovers, store in the fridge for up to a few days.


#halahbakes

Saturday, May 23, 2020

Apricot Orange Crumb Bars - Mabrousheh (Vegan)

If you need a fast and quick dessert recipe for a special occasion or holiday (like, Eid!), this recipe is it!  Nothing can go wrong with a beautiful crumb top, apricot jam, orange zest, and a lightly sweet pastry dough.  Go for it, my friends!  


Ingredients:

1/4 cup granulated sugar
1/2 cup coconut oil, melted
1/2 teaspoon vanilla
2 teaspoons orange zest
1 "Flax Egg"
  • 1 tablespoons flax seed meal
  • 3 tablespoons water
1 and 1/2 cups all purpose flour
2 teaspoons baking powder
1 cup apricot jam (normal or sugar-free)
Powdered sugar for sprinkling on top

Instructions:

Following these instructions exactly will provide the best results.

1. In a bowl, prepare your flax egg by combining the flax seed meal with water.  Let sit for five minutes.
2. In a mixing bowl, mix the sugar, coconut oil, vanilla, orange zest, and flax egg.  The mixture should be well beaten.
3. Add the flour  and baking powder and mix with your hands or a spatula until a thick dough forms.
4. Roll 1/3 of the dough into a ball, wrap in saran wrap, and freeze for 10 minutes.
5. On a greased 8x8 pan or an 8x8 pan with parchment paper, spread the remaining 2/3 of the dough evenly throughout the pan.  Make sure the dough is spread into a smooth and thin layer.  
6. Spread the apricot jam evenly over the thin layer of dough in the pan.  Make sure that the jam does not touch the sides of the pan.
7. Remove the reserved 1/3 of the dough from the freezer.  Evenly grate the dough over the top of the apricot jam so that you get a streusel-like look.
8. Bake in the oven for 35 minutes at 350 degrees.  For the last 5 of those 35 minutes, use the broil function of your oven to ensure that you get a slightly golden crumble on top  (watch the bars carefully so that they don't burn!).  
9. Remove the bars from the oven and let cool for at least 10 minutes.  Sprinkle powdered sugar on top of the bars and cut into squares.
10.  Enjoy!  If you have any leftovers, store in an airtight container in the fridge for up to 5 days.

#halahbakes

Monday, May 18, 2020

Tahini Date Cookies w/ Pecans (Vegan, Gluten Free)

These outrageously good cookies are my favorite!  The combination of nuts, tahini, and dates make these absolutely delicious!  Seriously.  And the texture?  Soft on the inside, slightly crisp on the outside, and bits of pecan crunchiness.  DROOL.  

I can't wait for you to try these out because they 1. are super easy with simple steps;  2. bake within minutes; and 3. taste superb!  Best of all, they can be customized!  Don't like dates?  Substitute chocolate chips.  Don't have pecans?  Don't add them, or sub another nut.

Stay safe and bake away, friends!


Ingredients:

1 cup old fashioned oats
1/2 cup almond flour
1/2 teaspoon salt
1/2 teaspoon baking soda
1/2 cup tahini
1/4 cup maple syrup
1 tablespoon vanilla
1/2 cup dates, chopped into small pieces
1/4 cup pecans, chopped into small pieces


Instructions:

Following these instructions exactly will provide the best results.


1. In a mixing bowl, combine the old fashioned oats, almond flour, salt, and baking soda.

2. Add the tahini, maple syrup, and vanilla.  Mix well to form a thick dough.
3. Stir in the chopped dates and pecans.
4. Roll tablespoon sized balls of dough and arrange on an ungreased cookie sheet, making sure each cookie is about 1 inch apart.  Gently flatten the tops of the balls of dough with your fingers (not too much, as the cookies will naturally spread).
5. Bake for 10-12 minutes at 350 degrees.
6. Remove the cookies from the oven and let rest for five minutes.  Resist the urge to touch the cookies or, otherwise, they might break! 
7. Gently remove the cookies from the cookie sheet with a fork or thin spatula.
8. Enjoy!  These cookies taste best warm, but you can store any leftovers in an airtight container in the fridge for about a week (tasting best by warming up in the microwave or oven).


#halahbakes

Wednesday, May 13, 2020

Sweet "Buttermilk" Cornbread (Vegan)

This recipe is an easy and fast way to some delicious, lightly-sweet, vegan cornbread.  Have a slice as a side with dinner or have some for dessert (drizzled with maple syrup).  Added plus: learn how to make vegan buttermilk!

Ingredients:

1 cup cornmeal
1 cup all purpose flour
1/3 cup sugar
2 teaspoons baking powder
1/2 teaspoon baking soda
1/2 teaspoon salt
1/3 cup melted coconut oil
2 "Flax Eggs"
  • 2 tablespoons flax seed meal
  • 6 tablespoons water

Vegan "Buttermilk" (to prep 10 minutes beforehand)
  • 1 and 1/3 cup almond milk (or, other plant based milk)
  • 1 tablespoon vinegar (or, lemon juice)
Instructions:

Following these instructions exactly will provide the best results.

1. Make the vegan "buttermilk" by mixing the almond milk and vinegar together.  Let sit for at least 10 minutes and set aside.

2. Prepare the flax eggs by combining the 2 tablespoons flax seed meal with 6 tablespoons water.  Mix and set aside for at least 5 minutes.
3. In a bowl, combine the cornmeal, all purpose flour, sugar, baking powder, baking soda, and salt.
4. Add in the melted coconut oil, "flax eggs," and vegan "buttermilk."  Stir until well combined.
5. Grease an 8x8 glass pan or metal pan with your choice of oil or tahini.
6. Pour the cornbread batter into the pan, making sure that the batter is evenly dispersed.  Smooth the top with a spatula or butter-knife.
7. Bake for 25 minutes at 375 degrees (or, until a toothpick inserted in the center comes out clean).
8. Let cool slightly before slicing and serving. 
9. Enjoy!  Store any leftovers in an airtight container at room temperature for 2-3 days.


#halahbakes

Sunday, May 10, 2020

Spanakopita (Vegan, Dairy-Free)

Growing up, my sister would make us Spanakopita (or, Greek Spinach and Feta Pie) on special occasions.  I loved it, and even ate it when I was allergic to feta cheese.  Why care about a skin rash when it tasted so good? :p

A couple years back, I became aware that you CAN make Spanakopita vegan AND dairy free.  Besides solving my allergy situation, I could also feed this to my vegan dad!  

This recipe is modeled off of the Vegan Word's recipe.  It required quite a few steps, but it was well worth the time.  Try it, fall in love, and repeat!


Ingredients:

10 sheets phyllo pastry
3 tablespoons oil or tahini for brushing the phyllo pastry
1 tablespoon oil
15 cups fresh spinach (about one large Costco pack), steamed, cooled, and drained (squeeze out any excess amounts of water)
1 onion, diced into small pieces
2 cloves garlic, chopped into fine pieces
3 tablespoons fresh dill, chopped
2 tablespoons fresh mint, chopped
6 green onions, chopped, making sure the white parts are chopped finely
1/2 teaspoon nutmeg
1 teaspoon salt
1 teaspoon black pepper
1 teaspoon ground chili pepper *optional*

Vegan Feta (to prepare beforehand)
1/2 pack drained extra firm tofu, crumbled into feta size pieces
1 tablespoon miso
1 tablespoon rice vinegar
1.5 tablespoons lemon juice
1 tablespoon dried oregano
1 tablespoon  dried thyme
3 tablespoons nutritional yeast
2 teaspoons tahini

Vegan Ricotta (to prepare beforehand or while cooking) 
1/2 pack drained extra firm tofu, pat dried with a towel
1/4 cup cashews
1 teaspoon lemon juice
1 teaspoon oil
1 garlic clove
2 tablespoons nutritional yeast
1/2 teaspoon salt


Instructions:

Following these instructions exactly will provide the best results.

1. Prepare the vegan feta by mixing the miso, rice vinegar, lemon juice, oregano, thyme, nutritional yeast, and tahini in a separate bowl.  Gently pour the sauce over the crumbled tofu, mix, and marinate in the fridge for at least 8 hours.

2. Prepare the vegan ricotta, by blending the tofu, cashews, lemon juice, oil, garlic, salt, and nutritional yeast until it forms a thick paste.  Set aside.
3. When the cheeses are ready, you can now begin assembling your spanakopita!  Start by preheating your oven to 350 degrees and greasing a 9x13 baking pan with oil or tahini.
4. Layer the first phyllo sheet into the tray and brush oil or tahini over the sheet.  Layer another phyllo sheet on the top of that and brush again with oil or tahini.  Repeat until you have done this for five phyllo sheets.
5. Bake the five phyllo sheets for 10 minutes in the oven.  Then, set aside.
6. In a fry pan, warm 1 tablespoon of oil.  Add the onions and saute until lightly golden brown.
7. Add the garlic, dill, mint, green onions, nutmeg, salt, pepper, and optional ground chili pepper to the fry pan.  Sautee with the onions for about 3 minutes.  Then, remove from heat and set aside.
8. In a large bowl, mix the spinach, fry pan mixture, vegan feta, and vegan ricotta until well combined.
9.   Spread the spinach mixture evenly over the pre-baked phyllo dough layers.
10. Place a phyllo sheet over the spinach mixture and brush oil or tahini over the sheet.  Then, layer another phyllo sheet on top of that and brush again with oil or tahini.  Repeat until you have done this for five phyllo sheets.
11.  Cut through the top layers of the phyllo sheets and spinach mixture, making serving size squares. Do not cut through the bottom layers of the pre-baked phyllo sheets.  This makes it easy to cut clean pieces prior to serving.
12.  Bake for 15 minutes at 350 degrees, and broil for one to two minutes to get a nice lightly golden brown color on top (watch the spanakopita carefully as ovens all vary)!
13.  Remove from the oven, and allow to cool for 20 minutes.  Cut through the bottom layers of the dough, following the square lines made previously.
14.  Serve and eat while warm or at room temperature.
15.  Store any leftovers in the fridge for 2-3 days, making sure to reheat in an oven prior to serving.


#halahbakes