Search This Blog

Showing posts with label dessert. Show all posts

Saturday, June 20, 2020

Indian Cashew Fudge - Kaju Katli (Vegan*, Gluten Free)

I am getting back to my roots today with this recipe for Kaju Katli, or Indian Cashew Fudge.  It is delicious, very easy to make, and a total hit!  You will only need 5 ingredients and you can easily make this vegan by omitting the ghee or by substituting coconut oil for the ghee.  

That said, ghee really enhances the flavor . . . so I highly encourage you to use it if you aren't strictly vegan.  

Btw, this recipe doesn't use an oven, but does require upper arm strength.  Sometimes you have to earn your desserts.  :p


Ingredients:

1 cup whole cashews
1/2 cup granulated sugar
1/4 cup water
1/2 teaspoon rose water  (you can purchase this at your local Indian, Middle Eastern, or Halal grocer)
1 teaspoon ghee (if vegan*, omit the ghee entirely or sub coconut oil)


Instructions:

Following these instructions exactly will provide the best results.

1. In a nut/spice grinder, grind the cashews into a fine dry powder.  Do not over grind or the mixture will become oily.  You can also use a food processor or blender, but you'll end up having small chunks of cashews that you'll have to sieve out.  Set aside the dry cashew powder.
2. In a saucepan over medium heat, combine the water, sugar, and rose water.  Mix well and until the sugar melts.  After the sugar melts, allow the sugar water to boil for about 1-2 minutes before turning down the heat to low.
3. Add in the cashew powder and stir, stir, and stir.  You do not want any lumps.
4. Add in the teaspoon of ghee.  And, continue to stir, stir, and stir.
5. Keep stirring for about 15 minutes or until the dough lumps together and leaves the sides of the pan.  Your arm should be tired by the end of this. ;) 
6. Once the dough lumps together and leaves the sides of the pan, remove the saucepan from the heat.
7. Using the spatula, transfer the hot dough to parchment paper.
8. Wait about five minutes for the dough to cool down before you touch it by hand, but don't wait too long as you need to knead the dough while it is hot/warm.
9.  Once you can comfortably touch the dough without burning yourself, knead the dough by hand until smooth/shiny.  Kneading will take about 4-5 minutes.  If your dough looks dry, sprinkle some water on top (but, you probably won't need to if you follow the measurements correctly).
10. Roll the dough into a log and place another piece of parchment paper on top of the log.  (You will have parchment paper on the bottom and on the top now).
11. With a rolling pin, evenly roll the dough to a 1/4 inch thickness.
12. Cut the dough into 1 inch square or diamond shapes.
13. Enjoy!  If you have any leftovers, store the kaju katli in an airtight container for up to a week.


#halahbakes

Sunday, May 31, 2020

Rose Orange Blossom Pudding - Mahalabia (Vegan, Dairy-Free)

This pudding is a veganized version of the Middle Eastern Muhallebi/ Mahalabia/ Mehalabya!   This pudding is usually made with milk and cream so I really challenged myself to find a good alternative.  With research, I found that the best alternative milk to use is rice milk as it allows for a creamy texture.  I also found that coconut cream added a richness that made this pudding extra delicious!

The traditional flavors are usually rose water (my personal favorite) or orange blossom water.  You can find both of these waters at your local Middle Eastern, Halal, or Indian grocery store.  If you can't find these or aren't a fan of those flavors, you can easily Americanize this by adding in vanilla instead of rose water or orange blossom water.  


Ingredients:

4 cups rice milk (divided into 1 cup and 3 cups)
3/4 cups granulated sugar
8 tablespoons cornstarch
1 can coconut cream
2 cardamom pods *optional*
1 tablespoon rose water (or, sub orange blossom water)
--Note: both can be found at your local Middle Eastern, Halal, or Indian grocery store
Nuts, Fruits, Toasted Coconut, Rose Syrup *optional*


Instructions:

Following these instructions exactly will provide the best results.

1. In a bowl, combine 1 cup of the rice milk with the cornstarch.  Mix into a smooth paste.  Set aside.
2. In a saucepan, whisk the remaining 3 cups of rice milk, granulated sugar, coconut cream, and optional cardamom pods.  Bring this mixture to a boil over medium heat while stirring slowly and consistently.
3. Slowly add in the cornstarch mixture, making sure to stir vigorously.
4. Continue stirring slowly and consistently for 12-15 minutes and until the mixture thickens.
5. Remove the pudding from the stove and stir in either 1 tablespoon of rose water or 1 tablespoon of orange blossom water.  *I personally enjoy the flavor of rose water more. **Also, don't get carried away with the rose water / orange blossom water...a little goes a long way!
6. Divide the pudding into small serving bowls or glasses.  Let cool for 15 minutes and top each serving bowl/glass with saran wrap (this prevents a pudding shell from forming on top).
7.  Refrigerate the pudding for 4+ hours and until set.
8.  Enjoy by serving and eating with nuts, toasted coconut, rose syrup, or your favorite fruit!  If you have any leftovers, these are stored well in the fridge, with saran wrap, for up to 3-5 days (as long as there is no fruit on top).

#halahbakes

Friday, May 29, 2020

Cheater Chocolate Mousse (Vegan)

Veganizing a tasty chocolate mousse is actually easier than you thought!  You'll need three ingredients, a blender, and refrigerator.  That's it.  Not only does this chocolate mousse taste delicious with fruits, toasted nuts, and toasted coconut, but it also can be used as a pie filling.  Ultimately though, this mousse is so easy to make that it feels like you are cheating on the real chocolate mousse!


Ingredients:

1 package silken tofu at room temperature 
Notes: --it MUST be silken
             --firm silken tofu gives you a thicker mousse
             -- soft silken tofu gives you a lighter mousse
1/2 cup dairy-free chocolate, melted
1 tablespoon agave syrup (or, sub maple syrup)
Nuts, Fruits, Coconut *optional*


Instructions:

Following these instructions exactly will provide the best results.

1. Drain the room temperature silken tofu and pat dry.
2. In a blender, blend the silken tofu, melted chocolate, and agave syrup until smooth.
3. Pour the mousse into your desired container(s) and refrigerate for at least 2 hours.
4. Decorate the mousse with your favorite toppings like fruits, nuts, or coconut.
5. Enjoy!  If you have any leftovers, store in the fridge for up to a few days.


#halahbakes

Saturday, May 23, 2020

Apricot Orange Crumb Bars - Mabrousheh (Vegan)

If you need a fast and quick dessert recipe for a special occasion or holiday (like, Eid!), this recipe is it!  Nothing can go wrong with a beautiful crumb top, apricot jam, orange zest, and a lightly sweet pastry dough.  Go for it, my friends!  


Ingredients:

1/4 cup granulated sugar
1/2 cup coconut oil, melted
1/2 teaspoon vanilla
2 teaspoons orange zest
1 "Flax Egg"
  • 1 tablespoons flax seed meal
  • 3 tablespoons water
1 and 1/2 cups all purpose flour
2 teaspoons baking powder
1 cup apricot jam (normal or sugar-free)
Powdered sugar for sprinkling on top

Instructions:

Following these instructions exactly will provide the best results.

1. In a bowl, prepare your flax egg by combining the flax seed meal with water.  Let sit for five minutes.
2. In a mixing bowl, mix the sugar, coconut oil, vanilla, orange zest, and flax egg.  The mixture should be well beaten.
3. Add the flour  and baking powder and mix with your hands or a spatula until a thick dough forms.
4. Roll 1/3 of the dough into a ball, wrap in saran wrap, and freeze for 10 minutes.
5. On a greased 8x8 pan or an 8x8 pan with parchment paper, spread the remaining 2/3 of the dough evenly throughout the pan.  Make sure the dough is spread into a smooth and thin layer.  
6. Spread the apricot jam evenly over the thin layer of dough in the pan.  Make sure that the jam does not touch the sides of the pan.
7. Remove the reserved 1/3 of the dough from the freezer.  Evenly grate the dough over the top of the apricot jam so that you get a streusel-like look.
8. Bake in the oven for 35 minutes at 350 degrees.  For the last 5 of those 35 minutes, use the broil function of your oven to ensure that you get a slightly golden crumble on top  (watch the bars carefully so that they don't burn!).  
9. Remove the bars from the oven and let cool for at least 10 minutes.  Sprinkle powdered sugar on top of the bars and cut into squares.
10.  Enjoy!  If you have any leftovers, store in an airtight container in the fridge for up to 5 days.

#halahbakes

Wednesday, May 13, 2020

Sweet "Buttermilk" Cornbread (Vegan)

This recipe is an easy and fast way to some delicious, lightly-sweet, vegan cornbread.  Have a slice as a side with dinner or have some for dessert (drizzled with maple syrup).  Added plus: learn how to make vegan buttermilk!

Ingredients:

1 cup cornmeal
1 cup all purpose flour
1/3 cup sugar
2 teaspoons baking powder
1/2 teaspoon baking soda
1/2 teaspoon salt
1/3 cup melted coconut oil
2 "Flax Eggs"
  • 2 tablespoons flax seed meal
  • 6 tablespoons water

Vegan "Buttermilk" (to prep 10 minutes beforehand)
  • 1 and 1/3 cup almond milk (or, other plant based milk)
  • 1 tablespoon vinegar (or, lemon juice)
Instructions:

Following these instructions exactly will provide the best results.

1. Make the vegan "buttermilk" by mixing the almond milk and vinegar together.  Let sit for at least 10 minutes and set aside.

2. Prepare the flax eggs by combining the 2 tablespoons flax seed meal with 6 tablespoons water.  Mix and set aside for at least 5 minutes.
3. In a bowl, combine the cornmeal, all purpose flour, sugar, baking powder, baking soda, and salt.
4. Add in the melted coconut oil, "flax eggs," and vegan "buttermilk."  Stir until well combined.
5. Grease an 8x8 glass pan or metal pan with your choice of oil or tahini.
6. Pour the cornbread batter into the pan, making sure that the batter is evenly dispersed.  Smooth the top with a spatula or butter-knife.
7. Bake for 25 minutes at 375 degrees (or, until a toothpick inserted in the center comes out clean).
8. Let cool slightly before slicing and serving. 
9. Enjoy!  Store any leftovers in an airtight container at room temperature for 2-3 days.


#halahbakes

Monday, May 4, 2020

Coconut Date Sehri Bars (Vegan, No Oil, Gluten Free)

Oh, coconut-y, date deliciousness!  These Coconut Date Sehri bars are flavorful and filling!  You don't even need to add chocolate.  But . . . chocolate added to the mix?  EPIC.  Making them requires some refrigeration, so plan to make these the night before breakfast.  Hoping you enjoy them as much as I did.


Ingredients:

1 and 1/2 cups old fashioned oats
1/3 cup maple syrup, agave syrup, or date puree
1 and 1/2 cups toasted unsweetened coconut
1/2 cup mixed nut butter (sub any type of nut butter)
1 cup deglet noor dates, soaked in water for 20 minutes
1/4 cup water
1/2 teaspoon salt
1 and 1/2 teaspoons vanilla
1/4 cup vegan chocolate chips *optional*


Instructions:

Following these instructions exactly will provide the best results.

1. To make the crust, blend the oats on low speed until the oats break into small pieces. Add the maple syrup into the blender until a sticky dough is formed.

2. Press the crust into an 9x5" baking dish (I used a glass dish - but recommend lining your pan with parchment paper if using a metal pan). Bake the crust for 15 minutes at 350 degrees. Remove the crust from the oven and cool.
3. In a blender, combine the soaked and drained dates, nut butter, salt, vanilla, and water until you have a thick paste.  
4. Pulse in the toasted coconut.
5. Spread the mixture on top of the crust base.
6. Refrigerate the bars for at least four hours.
7. *Optional* Melt the chocolate chips in a microwave at 30 second intervals until melted.
8. *Optional* Drizzle the tops of the bars with the melted chocolate.  Chill, until the chocolate sets.
9. Slice the bars and enjoy! Store leftovers in the fridge!


#halahbakes

Saturday, October 13, 2018

Lemon Blueberry Scones (Vegan)

You can't really go wrong with these lightly sweet scones. By mixing refreshing lemon with pops of blueberry, all your breakfast guests will be gobbling these easy bake, vegan scones! More importantly, you can mess around with the flavors -- ie switch out the lemon for orange and the blueberries for cranberries! Go wild, friends!

Ingredients:

2 cups all purpose flour
3 teaspoons baking powder
1/2 teaspoon salt
1/2 teaspoon nutmeg
1/3 cup white sugar
2 tablespoons lemon juice
2 teaspoons fresh lemon zest (takes about 1 to 2 lemons)
3/4 cup almond milk (plus a few extra teaspoons if necessary)
1 cup fresh blueberries


Instructions:

Following these instructions exactly will provide the best results.

1. In a bowl, mix the all purpose flour, baking powder, salt, nutmeg, and sugar together.

2. Stir in the almond milk, lemon juice, and lemon zest using a spatula or your hands.  The dough should not be super crumbly, but should be just moist enough to hold together.  *Add a teaspoon or two of almond milk if your consistency is still too dry.* But, remember, not to overwork your dough!
3. Gently mix in your blueberries.
4. Press the dough evenly into a flat circle in a greased 9 inch cake pan. The dough will be sticky!
4. With a knife, cut down the middle of the scones, 5 or 6 times, until you have 8 equal pieces.
5. Bake the scones for 20 to 25 minutes at 400 degrees.  The scones will be ready if the scones pass the toothpick test (Stick a clean toothpick into the middle of the scones: if the toothpick comes out clean, the scones are done!).
6. Let the scones cool completely. Cut the scones into 8 pieces (retrace the cuts you made before the bake) and serve with tea or coffee!


#halahbakes

Friday, October 5, 2018

Date, Almond, Banana Cookies (Vegan, No Oil, Sweetened with Fruit)

Too many bananas? Tired of banana bread? NO PROBLEM! This recipe is incredibly, easy, tasty, and healthy! With the crunch of sliced almonds and coconut, you can't go wrong with these vegan, no oil, fruit sweetened cookies! And, better yet, you can have cookies for breakfast. ;)


Ingredients:

1 cup old fashioned oats
1 cup quick oats
2 mashed bananas (must be ripe)
1/2 cup almond butter
1/4 teaspoon salt
1/2 teaspoon vanilla extract
1/4 cup chopped dates
1/4 cup sliced almonds
1/4 cup shredded coconut *optional*


Instructions:

Following these instructions exactly will provide the best results.

1. In a bowl, mash the bananas with a fork until they become smooth.

2. Stir in the old fashioned oats, quick oats, almond butter, salt, vanilla extract, chopped dates, sliced almonds, and optional coconut with the banana mixture. The dough will be fairly sticky.
3. Shape a heaping tablespoon of cookie dough into a ball like shape and place on a cookie sheet. Press down to flatten the tops of the cookies. (You will not need to worry about these cookies expanding in size).
4. Bake the cookies at 350 degrees for 15 minutes. They should be golden when done.
5. Remove the cookies from the cookie sheet with a fork. Let the cookies cool and enjoy!


#halahbakes

Monday, April 16, 2018

Coconut Date Magic Bars with Sesame (Vegan, No Oil, Gluten Free)

Magic bars are the best - but, I seriously couldn't imagine them without the ever-famous . . . condensed milk and chocolate. But, then, thankfully, I learned a cool trick for substituting condensed milk from Feasting on Fruit: blend 3 ripe bananas! With this tip, I then decided to sub out the chocolate for dates (because, honestly, dates are WAY better)! Hence, I am now able to share this incredibly tasty layered treat where you can save your evaporated milk and chocolate for a different day!

Ingredients:

1 and 1/2 cups old fashioned oats
1/3 cup maple syrup, agave syrup, or date puree
3 ripe bananas
3/4 cup chopped almonds
3/4 cup chopped dates
3/4 cup unsweetened shredded coconut
1/2 cup sesame seeds

Instructions:

Following these instructions exactly will provide the best results.

1. To make the crust, blend the oats on low speed until the oats break into small pieces. Add the maple syrup into the blender until a sticky dough is formed.

2. Press the crust into an 8x4" baking dish (I used a glass dish - but recommend lining your pan with parchment paper if using a metal pan). Bake the crust for 15 minutes at 350 degrees. Remove the crust from the oven and cool.
3. Blend the bananas until smooth.
4. Pour the banana puree on top of the crust.
5. Sprinkle the almonds on top of the banana puree, followed by the chopped dates.
6. Press the almonds and dates into the banana puree so that the banana puree rises up and covers the almonds and dates.
7. Sprinkle the coconut on top of the banana puree and gently press down - the banana puree does not need to cover the coconut completely, but should cover the coconut partially.
8. Finally sprinkle the sesame seeds on top of the coconut.
9. Bake for 40 minutes at 350 degrees.
10. Cool and then chill the bars in a refrigerator for at least 4 hours.

11. Slice the bars and enjoy! Store leftovers in the fridge!


#halahbakes

Saturday, February 24, 2018

Chocolate Filled Crispy Treats (Vegan, Gluten Free, and ONLY 4 Ingredients)

Ladies and gentlemen, these are the EASIEST, NO BAKE, and TASTY treats out there. Literally. You only need 4 ingredients, a microwave, and a 9 x 13 dish. Oh yes, this recipe is vegan, gluten free, and kid friendly too.


Ingredients:

12 cups gluten free crisped rice cereal
2 bags Dandies vegan marshmallows (total: 20oz of marshmallow)
8 tablespoons coconut oil
4 cups vegan chocolate


Instructions:

Following these instructions exactly will provide the best results.

1. In a large bowl, combine 1 bag of Dandies vegan marshmallows with 4 tablespoons of coconut oil. Microwave and stir in 30 second intervals until the marshmallows are fully melted.

2. Stir in 6 cups of cereal in the melted marshmallow until the cereal is evenly coated.
3. Press the marshmallow and cereal mixture evenly into the bottom of a 9x13 pan. (I use wax paper on the bottom of my pan for easy removal of the treats).
4. Melt the chocolate in a large bowl by microwaving and stirring in 30 second intervals.
5. Spread the melted chocolate over the marshmallow cereal layer. Let the chocolate cool by refrigerating the tray for 5+ minutes.
6. With the remaining 4 tablespoons of coconut oil, the remaining bag of Dandies, and the remaining bag of cereal, repeat steps 1 and 2.
7. Press the marshmallow and cereal mixture evenly over the top of the now cooled chocolate.
8. Cut the treats into 15 or more pieces and enjoy!


#halahbakes

Saturday, January 6, 2018

Classic White Chocolate Macadamia Nut Cookies

Growing up, I remember thinking that white chocolate macadamia nut cookies were the best cookies that ever existed. Twenty plus years later, I still agree that very few cookies can beat out the amazing qualities of this classic. 

Unlike most of the recipes on my blog, this recipe (inspired by Back for Seconds) calls for serious butter and sugar usage. :/ But, it is so worth it. 

For my healthy recipe followers, please don't be alarmed! I have posted some amazing healthy recipes on this blog too that are completely vegan, gluten free, and only sweetened with fruits! Check out these Epic Pecan Pie Bars or these Chocolate Chip Almond Flour Cookies!


Ingredients:

2 sticks (1 cup) unsalted butter at room temperature
2/3 cup brown sugar
2/3 cup granulated sugar
2 teaspoons vanilla extract
2 eggs
1/4 teaspoon salt
1 tablespoon corn starch
1 teaspoon baking soda
1/2 teaspoon baking powder
2 and 1/2 cups all purpose flour
1 cup white chocolate chips
1 cup unsalted macadamia nuts (if salted, rinse before using)


Instructions:

Following these instructions exactly will provide the best results.

1. In a large mixing bowl, cream the butter, brown sugar, and granulated sugar until smooth and creamy. This will take three to five minutes with a hand mixer.

2. Add vanilla extract, eggs, salt, corn starch, baking soda, and baking powder. Mix well.
3. Sift in the flour and mix until well combined.
4. Stir in the chocolate chips and macadamia nuts.
5. Roll one heaping tablespoon worth of dough into a ball and place on a baking sheet with parchment paper (or on an ungreased baking sheet).  Repeat and leave 2 to 3 inches between each cookie as these cookies expand like crazy.
6. Bake at 325 degrees for 12-13 minutes until the cookies start to become a very light golden brown. Remove the cookies from the oven and allow them to cool for about five minutes prior to transferring the cookies (otherwise they may break!).
7. Enjoy! Feel free to store leftover cookies in an air tight container in the fridge!


#halahbakes


Friday, December 29, 2017

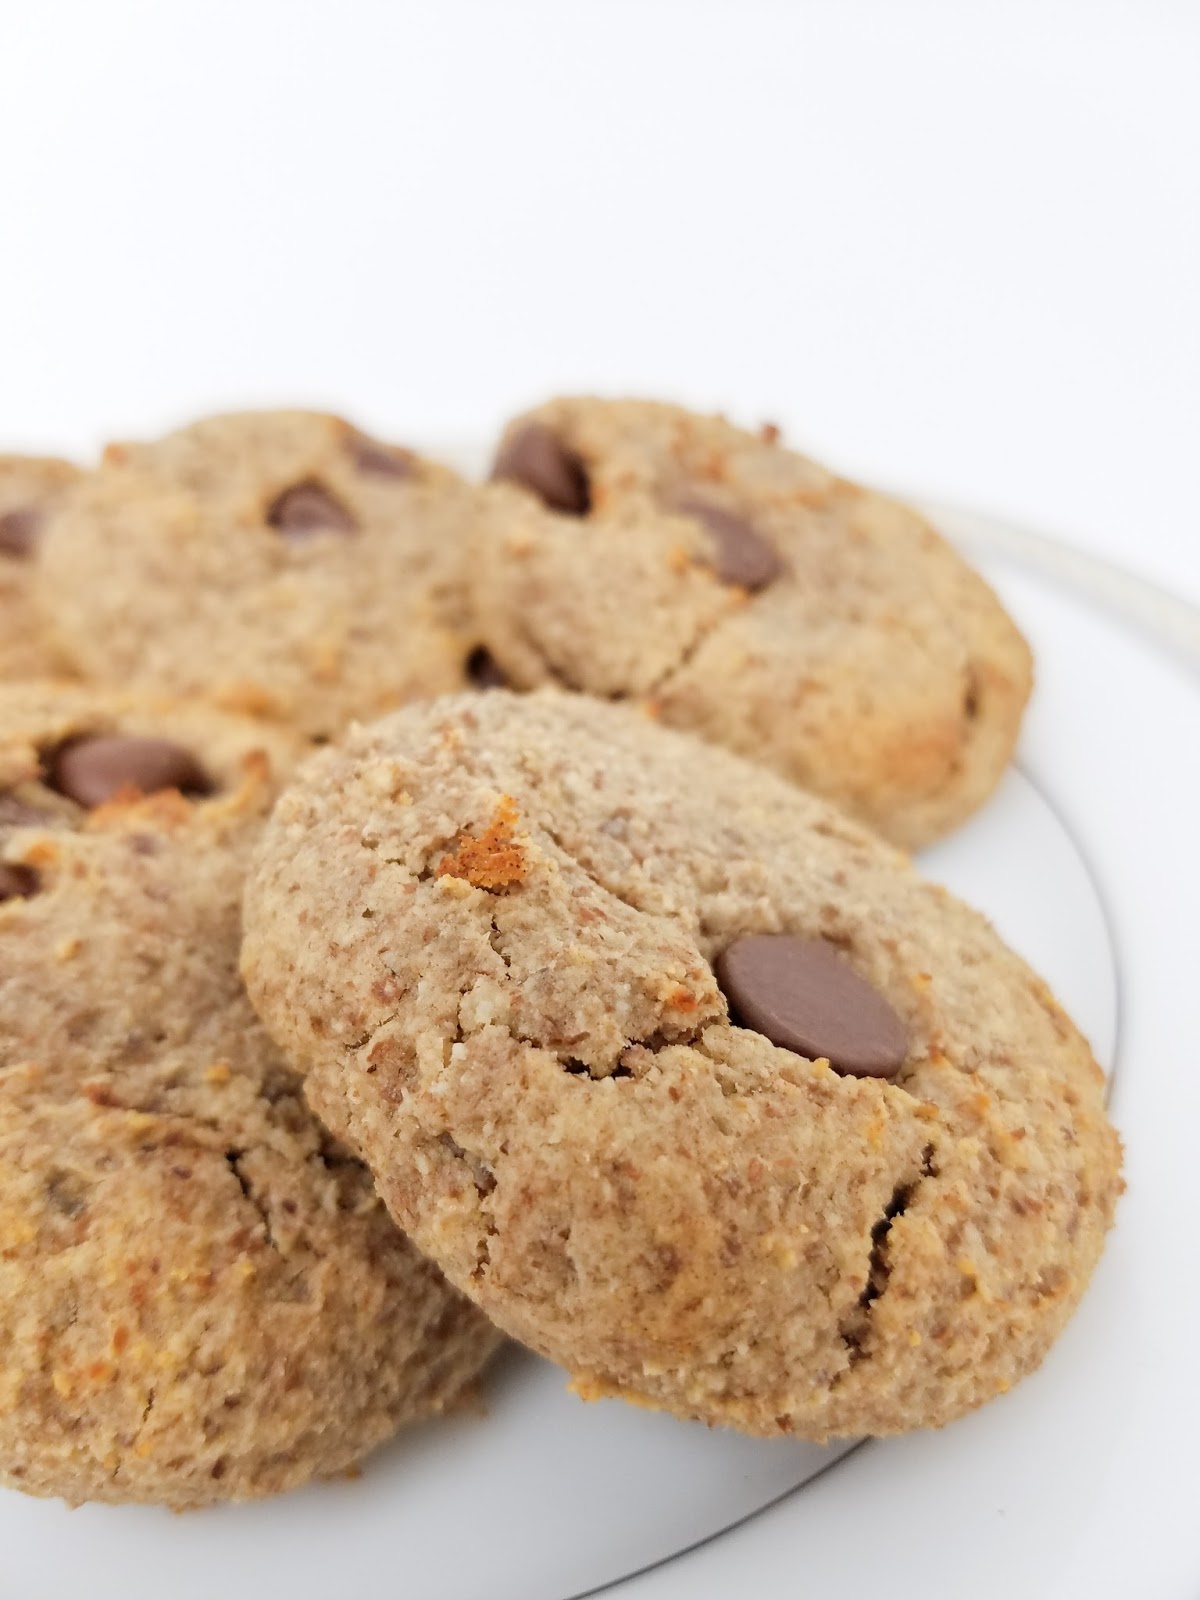
Chocolate Chip Almond Flour Cookies (Vegan, Gluten Free, Diabetic Friendly)

Thanks again to Feasting on Fruit for your incredible creativity. These cookies are sweet, soft, and date-I-say-it . . . "healthy." [You see what I did there?] The cookie base is sweetened with medjool dates. I played around with the recipe too and discovered that you don't even need chocolate chips. You can leave them out completely or substitute raisins.

P.S. I also tried making these without baking soda -- the recipe still works, but the cookies end up looking more like meat patties than cookies. Stick to using the baking soda!

Give these a try and let me know how you like them!

Ingredients:

12 pitted medjool dates
2/3 cup water
3 cups almond flour
1/2 cup peanut butter (you can find numerous brands without sugar)
1 teaspoon baking soda
2 teaspoons vanilla extract
1/4 teaspoon salt
1/2 cup vegan chocolate chips (or sub raisins)


Instructions:

Following these instructions exactly will provide the best results.

1. In a blender, blend the medjool dates with the water until you have a smooth date paste.
2. In a separate bowl, stir the date paste, almond flour, peanut butter, baking soda, vanilla extract, and salt until well mixed.

3. Stir in the chocolate chips.
4. Scoop out a heaping tablespoon worth of dough and roll into a ball. Place on a baking sheet lined with parchment paper. Press down to flatten.
5. Repeat with the remaining dough. Leave about 1/2 inch to 1 inch between the cookies.
6. Bake the cookies for 10 to 12 minutes at 350 degrees. The cookies will just start to turn golden brown.
7. Let the cookies cool for at least 10 minutes before eating!

8. Enjoy!

#halahbakes

Friday, December 15, 2017

Apple Sour Cream Coffee Cake

This coffee cake is apple-packed, moist, and deliciously soft. To be honest, this cake was only made so I could use up some extra sour cream and apples in my fridge. And, guess what? Amazing-ness. If you like this cake, try out some of my other recipes like this One Bowl Apple Walnut Cake or this Traditional Sour Cream Coffee Cake!


Ingredients:

For the cake:
1/2 cup (or 1 stick) unsalted butter at room temperature
1 cup white table sugar
2 eggs
1 teaspoon vanilla
1 teaspoon baking soda
1 teaspoon baking powder
1/3 teaspoon salt
2 cups all purpose flour
1 cup sour cream
2 cups apples, peeled and diced into 1/4 to 1/2 inch pieces


For the topping:
1/2 cup chopped walnuts (or, other nuts like almonds or pecans)
2 tablespoons cinnamon (optional: more cinnamon) 
1/4 cup brown sugar
1/4 cup white table sugar (optional: more white table sugar)
2 tablespoons butter


Instructions:

Following these instructions exactly will provide the best results.

1. For the cake, beat the butter for about 2 minutes until it is smooth and creamy with a hand mixer. Add the sugar and continue beating for another 2 minutes. Add in the eggs and beat thoroughly.
2. Then, mix in the vanilla, baking soda, baking powder, and salt until well combined.

3. Sift and then beat in 1/2 of the flour into the wet ingredients until just combined. Add in 1/2 of the sour cream and mix until incorporated. Then, sift and add in the remaining flour. Mix until combined. Finally, add in the remaining sour cream and beat until just incorporated. Do not over mix!
4. Stir in the diced apples.
5. Now, in a separate bowl, make your topping. Do this by combining the sugars, cinnamon, and walnuts in a bowl. Cut the butter into the mixture so that you have small to medium sized crumbs.
6. Sprinkle the topping over the cake batter. Optional: sprinkle more cinnamon and plain white table sugar on top for additional flavor.
7. Bake the cake for 40 minutes at 350 degrees. An inserted toothpick in the middle of the cake should come out clean.

8. Enjoy!

#halahbakes

Wednesday, December 6, 2017

Delicious Zucchini Brownies (Vegan)

This recipe by Crazy for Crust is my go-to! So delicious, even without the frosting! I have made a few modifications to the recipe (like adding chocolate chips and making a vegan ganache frosting). I have yet to meet a person who doesn't like these fudgy, chocolatey, gooey, and delicious brownies! I also have tricked tons of kids into eating veggies. Ha!


Ingredients:

For the brownies:
2 cups all purpose flour
1/2 cup cocoa powder
1 and 1/2 teaspoons baking soda
1/2 teaspoon salt
1/2 cup vegetable oil
1 and 1/2 cups sugar
2 teaspoons vanilla extract
2 cups shredded zucchini
3 to 6 tablespoons water
1/2 cup chocolate chips (you can find vegan chocolate chips at a natural food store)

For the optional ganache frosting:
1 and 1/2 cups chocolate chips (you can find vegan chocolate chips at a natural food store)
1/2 to 3/4 cup almond milk (or, other dairy or non-dairy milk)

Instructions:

Following these instructions exactly will provide the best results.

1. Using a hand mixer, mix together the oil, sugar, and vanilla until well combined.

2. Add in the flour, cocoa powder, baking soda, and salt. Mix well with the hand mixer.
3. Stir in the zucchini with a spatula. The mixture will be very powdery. Add in one tablespoon worth of water at a time until your batter is no longer powdery (this varies based on how wet your zucchini is). The dough will be very thick like cookie dough! Do not add too much water (it will be very unlikely that you will need 6 tablespoons of water) as this will change the consistency of the brownie. Confession: if I have 1/4 cup or 1/3 cup of extra shredded zucchini, I add that in and skip this water step.
4. Fold in the chocolate chips.
5. In a greased 9x13 pan (or in a pan with parchment paper), spread the batter evenly in the pan.
6. Bake the brownies at 350 degrees for 25 minutes. Remove them from the oven and let them cool at room temperature. 
7. While the brownies are cooling, make the optional frosting by microwaving the chocolate chips and almond milk at 30 second intervals, mixing between intervals. You are done when the ganache is shiny, smooth, and a barely thick consistency. If the ganache gets too thick, re-warm in the microwave. If it is still too thick, add more almond milk and rewarm.
8. Spread the frosting evenly over the brownies and let the brownies cool completely.
9. Once the brownies are cool, cut them into squares. And, enjoy!
10. If you have leftovers, store them in an air-tight container in the fridge. In my opinion, these brownies taste even better on the second day as they are even gooer!

#halahbakes


Monday, November 27, 2017

Fudge Stuffed Cookie Bars

Okay. So this recipe is not healthy in any way, but it is so darn delicious, it must be posted! These soft, fudgy, and gooey bars will rock your world. Seriously. Bake these for your friends and family this winter, dunk them in milk, and let me know your thoughts! Special thanks to Back for Seconds for the inspiration behind this epic recipe.


Ingredients:

For the cookie:
1 cup (2 sticks) of softened unsalted butter
2/3 cups brown sugar
2/3 cups granulated sugar
2 eggs
1 and 1/2 teaspoons vanilla
1/2 teaspoon salt
1 and 1/2 teaspoons baking soda
2 and 1/3 cups all purpose flour
1 cup chocolate chips

For the fudge filling:
1 14 oz can of condensed milk
2 cups chocolate chips


Instructions:

Following these instructions exactly will provide the best results.

1. With a hand mixer, cream together the butter and sugars in a large bowl until they are light and creamy.

2. Mix in the eggs, vanilla, salt, and baking soda until thoroughly mixed.
3. Sift the flour and stir until combined.
4. Stir in the chocolate chips.
5. In a greased 9x13 pan (or in a pan with parchment paper), press 1/2 of the dough into the bottom of the pan. Set the other half of the dough aside.
6. Melt the condensed milk and chocolate in the microwave for 30 seconds at a time until melted and smooth. Mix after each 30 second interval.
7. Pour the warm fudge over the cookie dough in the 9x13 pan. Make sure the fudge is evenly spread.
8. Take the remaining 1/2 of the cookie dough and gently and evenly spread the cookie dough over the fudge. This is easiest with your hands and a spatula / butter knife. You are done when you can no longer seen any of the fudge filling.
9. Bake for 25 minutes or until golden brown at 350 degrees.
10. Cool the cookie bars on the counter and then chill the bars for at least 2 hours in a refrigerator before cutting into squares.
11. Enjoy! Store any leftovers in an air-tight container in the fridge.


#halahbakes